
Posted by Chris Randle on 10th Sep 2018
6 baking tips you need to know!
Whether you've been baking for decades or you're putting on an apron for the first time to follow along with the Bake Off, there are always small techniques that make a disproportionate difference. These six are the ones we find ourselves repeating most often — none of them cost anything, and every one of them shows up in the finished bake.
1. Sift everything, not just the flour
Most recipes tell you to sift the flour to knock out lumps and get a lighter cake. Worth doing — but the better habit is to sift all of your dry ingredients together: flour, raising agents, cocoa, spices, salt. It does two jobs at once: aerates the mix and distributes the raising agents evenly, so you don't get one bitter pocket of baking powder and an uneven rise. Ten extra seconds, noticeably better crumb.
2. Crimp pastry with a key
Taste comes first, but a pie that looks deliberately finished is a satisfying thing — and you don't need a special tool. The hooped end of an ordinary old key pressed around the pastry edge gives a neat, repeating pattern that looks like it took far longer than it did. It works on anything with a sealed edge, from a full pie to a batch of mince pies. If your pastry itself needs work before the decoration stage, start with our guide to making perfect pastry.
3. Scoop your batter with an ice cream scoop
Spoons are how you end up with one biscuit the size of a coaster and one the size of a coin — and they bake accordingly, the small one overdone before the big one is set. An ice cream scoop portions cookie dough, muffin batter and cupcake mix into identical rounds, so everything on the tray finishes at the same moment. It's also considerably less sticky than doing it by spoon and finger.
Even portions only get you halfway, mind — the tray has to heat evenly too. A thin tray with hot spots will still bake one row faster than the other, whatever the scoop did. If your muffins rise unevenly however carefully you portion, our muffin tin buying guide explains what's going on.
4. Know your real oven temperature
Baking is the branch of cooking where the science actually matters, and most domestic ovens are quietly lying about their temperature — 10 to 20 degrees out is common, and hotter at the back than the front. That's the hidden cause behind a lot of "what did I do wrong?" bakes: flat Yorkshire puddings, pale biscuits, sunken sponges.
A decent oven thermometer costs a few pounds and settles the question permanently. Once you know your oven runs 15 degrees cool, every recipe you'll ever follow just started working better. It also stops you compensating with maximum heat, which shortens the life of any non-stick coating without improving the bake.
5. Chill your crumb coat before decorating
If you're attempting a properly decorated cake, do it in two stages. Spread a thin base coat of frosting over the whole cake — it will look scrappy, that's fine; it's there to trap the crumbs — then chill the cake in the fridge for 20–30 minutes. The chilled base coat sets into a firm, smooth surface, and the final layer of frosting goes on cleanly with no crumbs dragged through it. Every neat cake you've admired online was almost certainly built on a chilled crumb coat. The same logic is why mini fluted cakes are such an easy win — the tin does the decorating, and a drizzle of glaze finishes the job.
6. Chill your cream (and the bowl) before whipping
Cream whips faster and holds its shape better when it's properly cold — the fat needs to be firm to trap air. Ten minutes in the freezer before whipping makes a real difference, and chilling the bowl and whisk too is the pastry-kitchen version of the trick. Warm cream, by contrast, can refuse to whip entirely and slides towards butter if you push it. Cold cream, cold bowl, and it comes together in half the time.

Cookie Sheet Pan Baking Tray — 32cm x 22cm
£16.99
Flat, heavy carbon steel that browns your scooped biscuits evenly from edge to edge. Non-stick made without PTFE or PFOA.
View product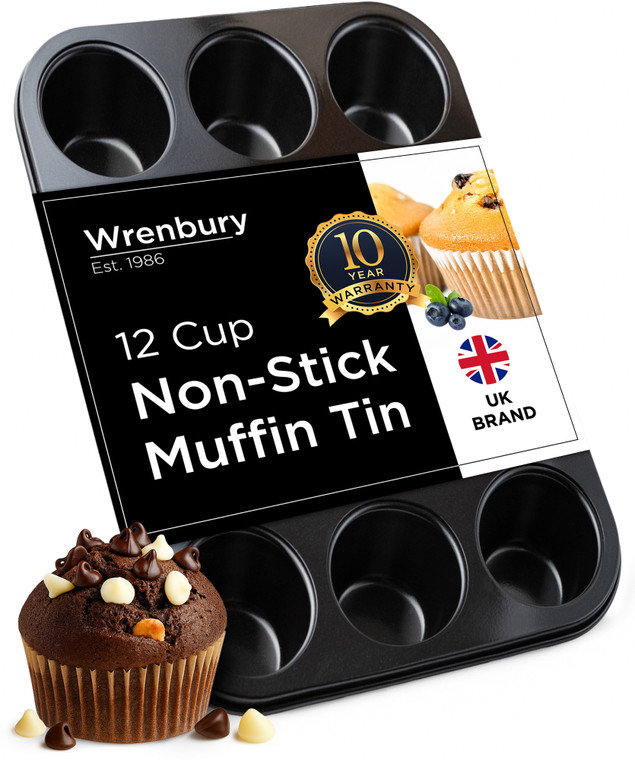
Non-Stick 12 Cup Muffin Tray
£21.99
1mm carbon steel with 120ml cups — scoop the batter evenly and all twelve rise together. 10-year guarantee.
View productGood habits deserve good kit that lasts as long as they do — everything in the range is heavy-gauge carbon steel with a 10-year guarantee, and the care and use guide covers how to keep it all baking evenly for the duration. The full range is at all bakeware.
Frequently asked questions
Do I really need to sift flour?
For cakes and light sponges, yes — it removes lumps, adds air, and (if you sift all the dry ingredients together) distributes the raising agents evenly so the rise is uniform. For bread and sturdy bakes it matters far less, since kneading does the mixing for you. Ten seconds through a sieve is cheap insurance for anything delicate.
Why do my biscuits bake unevenly on the same tray?
Two causes, usually together: uneven portions (a spooned biscuit varies enormously in size, and small ones finish first) and an unevenly heating tray. An ice cream scoop fixes the first. A heavy, flat carbon steel tray fixes the second — thin trays develop hot spots and warp, which slides biscuits into one corner and bakes one row faster than the other.
Is an oven thermometer worth buying?
Yes — it's the cheapest upgrade in baking. Most domestic ovens run 10–20 degrees away from what the dial claims, and every recipe you follow assumes the dial is telling the truth. A few pounds and one test bake tells you your oven's real behaviour, and you adjust once instead of guessing forever.
Why won't my cream whip?
It's almost certainly too warm — the fat in cream has to be cold and firm to trap air. Ten minutes in the freezer for the cream (and the bowl and whisk, ideally) and it will whip in half the time and hold its peaks. Also check the fat content: single cream won't whip at all; you need double or whipping cream.
What is a crumb coat?
A thin first layer of frosting spread over the whole cake to trap loose crumbs, chilled for 20–30 minutes until firm. The final frosting layer then goes over the top cleanly, with no crumbs dragged through it. It's the single technique that separates smooth, professional-looking cakes from homemade-looking ones.